搭建github博客
hexo+github博客的搭建
创建发布文章
预览
提交
1
2
3
| git add .
git push
hexo clean && hexo deploy
|
搭建基于GitPages的hexo个人博客
一 预安装环境
1. 安装git
在deb系上
1
| sudo apt-get install -y git
|
2.安装node.js
见distributions/README.md at master · nodesource/distributions · GitHub
全平台安装包Download | Node.js
3.安装hexo
1
2
| sudo npm install -g hexo-cli
hexo -v#查看是否安装成功
|
二 开始搭建吧
1
2
3
4
5
6
7
| cd ~
mkdir yourBlogName
cd yourBlogName
hexo init
npm install
hexo g
hexo s
|
预览你的博客
http://localhost:4000
安装主题
1
2
3
| git clone https://github.com/theme-next/hexo-theme-next themes/next
cd themes/next
git tag
|
git tag查看relases的版本 并切换到稳定版本
1
2
3
4
5
6
7
8
9
10
11
12
13
14
15
16
17
18
19
20
21
22
23
24
25
26
27
28
29
30
31
32
33
| pi@raspberrypi:~/blog/themes/next $ git tag
v6.0.0
v6.0.1
v6.0.2
v6.0.3
v6.0.4
v6.0.5
v6.0.6
v6.1.0
v6.2.0
v6.3.0
v6.4.0
v6.4.1
v6.4.2
v6.5.0
v6.6.0
v6.7.0
v7.0.0
v7.0.1
v7.1.0
v7.1.1
v7.1.2
v7.2.0
v7.3.0
v7.4.0
v7.4.1
v7.4.2
v7.5.0
v7.6.0
v7.7.0
v7.7.1
v7.7.2
v7.8.0
|
我这里是v7.8.0
1
2
| git checkout v7.8.0
rm -rf .git
|
并删除.git文件夹
回到主目录
编辑_config.yml文件
更改theme项为next
验证更改
1
2
3
| hexo clean
hexo g
hexo s
|
更改外观
1
| vim themes/next/_config.yml
|
找到Schemes项 将其修改为下面的样子 每一行对应一种外观
1
2
3
4
5
| # Schemes
#scheme: Muse
#scheme: Mist
scheme: Pisces
#scheme: Gemini
|
三 自定义你的博客
设置语言
编辑站点配置文件(指根目录下的_config.yml,主题目录下的_config.yml为主题配置文件,以后都如此称呼)
编辑
配置文件
1
2
3
4
5
6
7
8
9
10
11
12
13
14
15
16
17
18
19
20
21
22
23
24
25
26
27
28
29
30
31
32
33
34
35
36
37
38
39
40
41
42
43
44
45
46
47
48
49
50
51
52
53
54
55
56
57
58
59
60
61
62
63
64
65
66
67
68
69
70
71
72
73
74
75
76
77
78
79
80
81
82
83
84
85
86
87
88
89
90
91
92
93
94
95
96
97
98
99
100
101
102
103
104
105
106
|
title: Hexo
subtitle: ''
description: ''
keywords:
author: John Doe
language: zh-CN
timezone: ''
url: http://example.com
root: /
permalink: :year/:month/:day/:title/
permalink_defaults:
pretty_urls:
trailing_index: true
trailing_html: true
source_dir: source
public_dir: public
tag_dir: tags
archive_dir: archives
category_dir: categories
code_dir: downloads/code
i18n_dir: :lang
skip_render:
new_post_name: :title.md
default_layout: post
titlecase: false
external_link:
enable: true
field: site
exclude: ''
filename_case: 0
render_drafts: false
post_asset_folder: false
relative_link: false
future: true
highlight:
enable: true
line_number: true
auto_detect: false
tab_replace: ''
wrap: true
hljs: false
prismjs:
enable: false
preprocess: true
line_number: true
tab_replace: ''
index_generator:
path: ''
per_page: 10
order_by: -date
default_category: uncategorized
category_map:
tag_map:
meta_generator: true
date_format: YYYY-MM-DD
time_format: HH:mm:ss
updated_option: 'mtime'
per_page: 10
pagination_dir: page
include:
exclude:
ignore:
theme: next
deploy:
type: ''
|
按自己需求配置 配置完后即可生成预览
主题配置
参考https://wylu.me/posts/e0424f3f/
四 发布

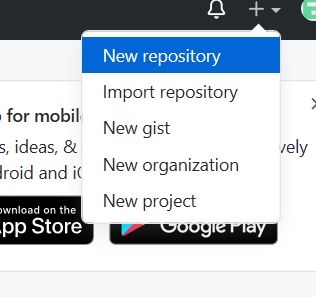
创建一个和你用户名相同的仓库,后面加github.io
初始化库
1
2
3
4
| git init
git config --global user.email "[email protected]"
git config --global user.name "Your Name"
git commit -m 'init'
|
然后安装上面的提示添加远端git库 并推送
1
2
| git remote add origin https://github.com/YUAN321340/YUAN321340.github.io.git
git push -u origin master
|
参考
在 GitHub Pages 上部署 Hexo | Hexo
优化
发布文章
编写source/_posts/下的对应的.md文件
附
cloudflare也可以免费部署博客页面 而且在全球有CDN加速
官方教程
需要注意 有些新版本hexo指令前面需要加上npx
例如npx hexo g
